Deploy first domain controller AD forest/ Deploying Windows AD forest ( GUI Method )
Step 1:
Go to Server Manager >> Manage >> Add Roles and Features
Click Next and select " Role based or Feature based Installation"
Local server will be automatically added to server pool, Make sure "Select a Server From the Server Pool'' is selected and your server name in added in the server poo, Now Click next.
Step 3:
Select "Active Directory Domain Services" From Roles list.
A popup window will appear with "You cannot install Active Directory Domain Services unless the following role services or features are also installed". Click "Add Features", this will automatically add all dependent Roles and Features.
Step 4:
All dependent features are automatically select, Hence we don't need to select on Feature page, Simply click Next to proceed further.
Step 5:
Click Next on the confirmation screen.
Step 6:
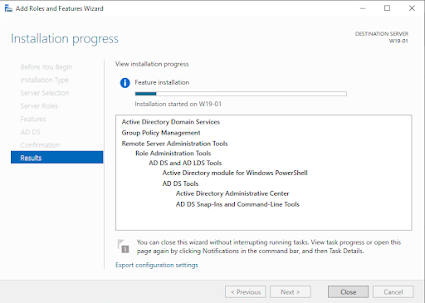
Now required features will be installed in couple of minutes. No reboot is require.
Step 7: ( Configure AD DS or Promote first domain controller)
You can either use " Promote this server to a domain controller" on the installation screen or post deployment configuration option from flag icon in the server manager.
Step 8:
Select AD deployment type, Since its a first domain controller in new forest, Select " Add a new forest" option and enter the domain name of the forest in "Root domain name " field. Now Click Next.
Step 9:
Functional level :
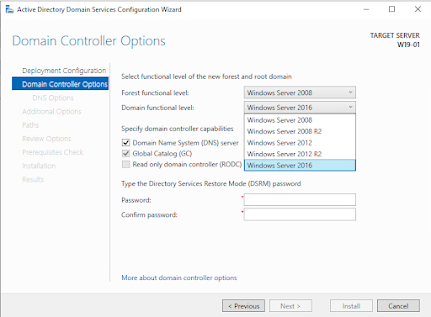
Now Select Forest and Domain forest functional levels. Since i'm using windows server 2019, default functional levels " Windows Server 2016" are selected. If you want you can select lower functional levels from the drop down menu.
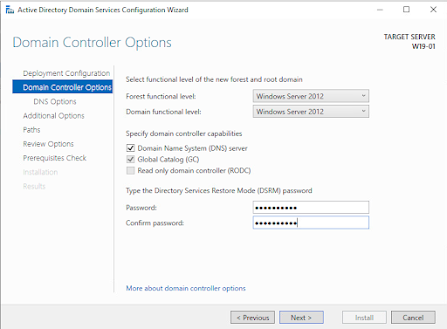
For this setup i will use "Windows Server 2012" functional levels for forest and domain.
Step 10:
" Domain Name System (DNS) Server" and "Global Catalog (GC)" options are selected by default. Use default options unless you want to alternate DNS services.
Step 11:
Enter the "Directory Service Restore Mode ( DSRM)" Password. You need this password for restoring or repairing domain services.
Step 12:
DNS Options : If you are using non public domain name, you can ignore DNS delegation warning " A delegation for this DNS server cannot be created because the authoritative parent zone cannot be found".
Click Next.
Step 13:
System will automatically generate a NetBIOS domain name from root domain name or you can type in your preferred NetBIOS name and Click Next.
Step 14:
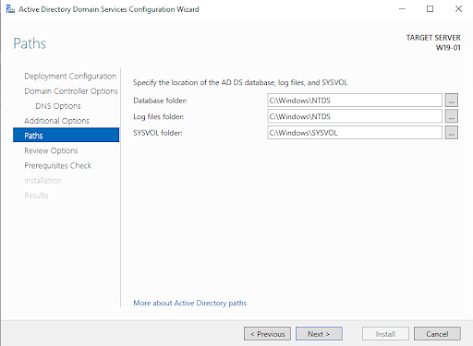
It is recommended to leave the paths to default. By default it will be stored under C:\Windows. But you can point them to alternate path.
Step 15:
Review options selected and click Next.
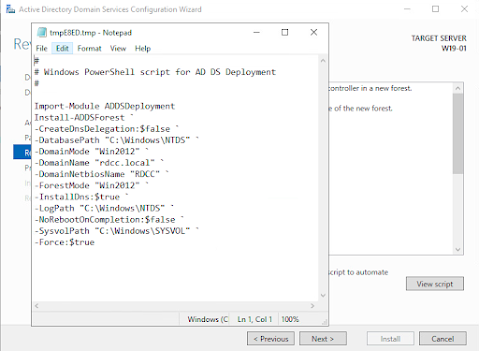
You can use " View Script" option to create powershell script to use automate domain controller deployment.
Step 16:
Minor warnings reported by Prerequisites Checks can be ignored. Make sure " All prerequisite checks passed Successfully" message displayed.
Click Install to proceed with domain controller deployment. Installation might take couple of minutes to complete, After installation Server will be automatically rebooted.
The reboot might take more than the usual time to apply group policies during startup.
Once it is completed you can login with you administrator password.
Step 17:
We have successfully deployed our forest with first domain controller.








Post a Comment